Header/Navigation Bar

Showing posts with label hair. Show all posts

Monday, December 21, 2015

Review: Proganix Volume Product Line*

Hey Guys,
Today I am going to introduce you to the Proganix Volume hair product line. For those of you unfamiliar with Proganix, it is a more professional line created from the brand OGX (Organix). Proganix products are created with the best ingredients of nature and science combined. I have already tried their Quench and Anti-Fade lines. You can check out my thoughts on each HERE and HERE.

Proganix Volume
Proganix Volume Product Line
Here is what is said about this product on the Proganix site:
"When it comes to hair, bigger can be better. Take your roots to new heights with this powerful combination, infused with caffeine and soy protein, which helps volumize and plump every strand with lift, life and shine."-https://www.proganixbeauty.com/products/volume/

Wednesday, October 28, 2015

Review: Proganix Anti-Fade Line*

Hey Guys,
Today I am going to share with you another hair care product line by Proganix. They sent me a bunch of products to try out and some extra little goodies. The product line is their Anti Fade line for color treated hair. I recently reviewed their Quench line which you can check out HERE.

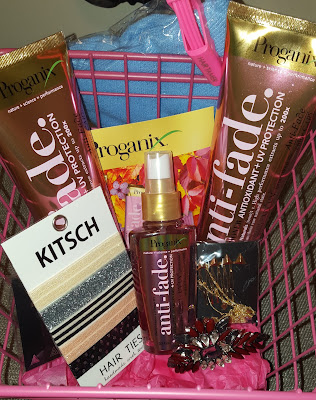
Here are the goodies that I received:
Proganix Anti-Fade Line

Some Kitsch hair accessories...
Proganix Anti-Fade Line
These are super cute in your hair and on your wrist. They don't hurt or get stuck in your hair.
Proganix Anti-Fade Line
This is the first bun accessory I have seen. It is a cute idea. I will try it out and see if it looks good on me. It might look cute on younger girls.

Proganix Anti-Fade Weightless Argan Oil $11.99
Proganix Anti-Fade Line
Here is what is said about this product on the Proganix site:
"Proganix Anti-Fade Cherry Blossom + Vitamin B5 Weightless Argan Oil is a blend of color protecting argan oil, antioxidant rich cherry blossom extract, UV filters, for color that has a rich, deep glow. Argan Oil, Anti-oxidant, UVA & UVB protection, not tested on animals."

I thought that this was a nice product. You want to be careful not to use too much or you will make your hair greasy. Just mist a small amount about 5-6 inches away from your head to help tame fly aways and to protect your hair from the sun.

Proganix Anti-Fade Shampoo & Conditioner $9.99
Proganix Anti-Fade Line
Here is what is said about this product on the Ulta site:
"Proganix Anti-Fade Cherry Blossom + Vitamin B5 Shampoo and Conditioner is a color protecting blend of sulfate-free surfactants, antioxidant rich cherry blossom extract combined with UV filters, perfected in the salon, for reds that stay vibrant, blondes that shimmer and brunettes that stay brilliant giving your hair you'll always love.Sulfate-free surfactants, anti-oxidant, UVA & UVB protection, Anti-Fade, not tested on animals."

I really like that this product line protects color treated hair and helps keep it from fading. I also love that it is sulfate free. The scent smells nice but I prefer the coconut scent of the Quench line. If you are a fan of cherry blossoms and floral scents, you will like the smell of this line. After using the shampoo and conditioner my hair felt clean and soft. My hair seems to be keeping its color pretty well but I also use other products to help keep my hair vibrant. Overall, I like this product line.

Have you tried the Anti-Fade Line by Proganix? Post your comments below!

*I was sent these  products as a gift.  However, the thoughts and opinions in this post are my own. I am always 100% honest in my reviews for all products discussed on my blog.

Monday, September 28, 2015

Review: Proganix Quench*

Hey Guys,
Today I'm going to share my thoughts on some products from the new Proganix line of hair care. For those of you unfamiliar with Proganix, it is the sister brand of OGX (Organix). Proganix products are created with the best ingredients of nature and science combined. 
Proganix Quench
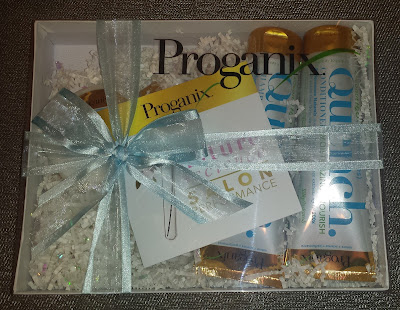
The product line that I was sent to test out was the Quench line. Proganix Quench products are all about replenishing, hydrating and nurturing dry damaged hair. Quench products are made with coconut water, coconut oil, and electrolytes.
Proganix Quench

Proganix Quench
This product helps replenish and moisture your hair while you sleep. Put a small amount of this in your wet or dry hair at night and style as desired in the morning. This is said to make your hair soft and silky.

Proganix Quench
This moisture mist it supposed to protect your hair while you swim in a pool or at the beach. You spray it beforehand and the product protects your hair from harsh chemicals. I actually having been spraying this in my towel dried hair after showering at night and it leaves my hair feeling super soft the next day.

Proganix Quench
This shampoo and conditioner is supposed to hydrate and nourish dry hair. The conditioner is also supposed to mend split ends.

On to my thoughts:
First of all, these products smell absolutely amazing! If you are a fan of coconut or island type scents, you will love the scent of these products. I love the ingredients in this line. Coconut oil is supposed to be really good for your hair. I really liked all of the products from this line. My favorite product was the Leave In Moisture and Nourish Mist. Even though I don't use it exactly the way it is said to, it still makes my hair feel super soft and silky the next day. I highly recommend this line and will definitely will be purchasing it once I run out of these products.

Have you tried the Proganix Quench line? What product are you most interested in? Post your comments below!

*I was sent these  products as a gift.  However, the thoughts and opinions in this post are my own. I am always 100% honest in my reviews for all products discussed on my blog.
Tuesday, September 9, 2014

Review: Nume Lustrum

Hi Ladies!
Today I am going to review the Nume Lustrum Curling Wand Set. This set retails for $280.00 on the Nume Site. I purchased this set during a Nume Instadeal on Instagram and only paid $80.00 (plus $12.00 shipping) for it! I was so happy that I waited to get this set. I almost purchased it a few months ago when there was an offer code to get it for $159.00. Good thing I waited! One thing I must note...it took almost a month to receive the product but they took the money out of my account right away. Since I already have a few other curling irons, I didn't mind the wait. Because it took so long to get to me, Nume sent me a free gift to thank my for my patience. The gift was the Nume styling comb which retails for $20.00. The comb helps de-tangle your hair and assist with straightening your hair with an iron. I haven't really used it yet so I can't comment on how it works.

On to the Lustrum....
The Lustrum comes with 5 different barells; 32 mm, 25 mm, 19 mm, Reverse, and Pearl. The heads are interchangeable and lock into place. Along with the barells is a base which is the had piece of the wand. It has an on and off button but no temperature setting. I own 3 Hot Tools curling irons and the Nume gets just as hot and works just as well. It actually heats up in seconds.  It is very light weight compared to my other styling tools. The only thing I don't like is that it doesn't have a little metal clamp that you can pull down to let it rest against instead of putting it on a flat surface.

Wednesday, February 19, 2014

Hair Tutorial: Braided Half Updo

Hi Ladies!
Here is a cool hair tutorial by Lilith Moon. I would consider this a little easier than the Greek Goddess Updo. For more tutorials check out her you tube page http://www.youtube.com/user/lilithedarkmoon?feature=watch .


What do you think of this hairstyle? Too funky or just the right amount of punk?

-Tanya xoxo

Thursday, January 2, 2014

Hair Tutorial: Triple Braid

Hey Girls,
So I came across a quick braid tutorial on Facebook and tried to replicate it. The photos are kind of vague and there are no written steps so I kinda winged it. 

Here is the tutorial:


http://www.buzzfeed.com/peggy/five-minute-hairstyles-for-busy-mornings?sub=2570234_1610174

Wednesday, December 4, 2013

Holiday Look: Hair Tutorial

Hi Ladies,
Here is part two of my Holiday Look Tutorial.

This is my first video tutorial so bear with me! Hopefully I get better as time goes on.


 Here is the finished look! It didn't come out perfect but it worked for my pictures. I did learn that my hair doesn't curl well after straightening it the day before. I will most definitely remember this for next time....


Friday, November 22, 2013

Hair Tutorial: Half Up Half Down Bow

Here is another bow hairdo. This is easier than the last bow tutorial. 

This only has 5 steps. 

1. Grab hair from each side of your head and pull back like you are doing a half up half down hairdo.

2.When tying the ponytail, wrap the elastic around 3 or 4 times and on the last time leave a bump with a tail on the end.

3. Take the bump and separate it down the middle.

4. Take the tail of the pony and wrap it around the middle of the bump to create the center of the bow and pin the end where it is hidden.  You can either wrap the whole tail around the middle or wrap half and leave the rest hanging.

5. Lastly, puff out each side of the bow to make it look full.


What do you think of this look? Post your comments below!

Thursday, November 14, 2013

Hair Tutorial: Greek Goddess Updo

Here is a cute hair tutorial that would look great with a fancy dress for a wedding as well as with a blazer and jeans for a casual day out. I would consider this a moderate to hard hairsyle as the braiding underneath could get a little tricky. The woman in the tutorial named Lilith Moon has a lot of great hair tutorials on her you tube page. Click on the link to get to her page http://www.youtube.com/user/lilithedarkmoon?feature=watch


Would you rock this updo? Post your comments below!

Monday, November 11, 2013

Hair Tutorial: Bow Updo

Here is a cute and quirky hair bow updo. It may be a little tough for people that can't french braid.

There are basically 4 steps. 

1. You start by making a french braid starting from the nape of your neck upwards. 

2. Next gather the hair into a ponytail. Once you wrap the elastic around the third or 4th time leave a bump sticking up with the remainder of our hair hanging in a ponytail.

3. Take the bump you created and part it in half. Next, take half of the hair left out and wrap it in around the middle of the separated bump and pin.

4. Lastly, take the rest of the left over hair and wrap around the base of the bow, tie the hair in a knot, and pin.


Try this out and post links to your pics below!

Monday, November 4, 2013

Hair Tutorial: Fish Tail Bun

Here is a cute Fishtail Bun. 

Step 1: add body to your hair by curling chunks of your hair and curling pieces you will leave down in the front.

Step 2: Tease the back of your hair to add volume.

Step 3: Fishtail your hair to one side. Once you are done loosen the fishtail by gently pulling outward.

Step 4: Twist the fishtail up and back and pin the braid to your head into a bun shape.


If you don't know how to create a fishtail braid CLICK HERE for a link to a tutorial video.

What do you think of this updo? Post your comments below. If you successfully create this updo post pics below! I would love to see pics or hear tips that may help create this look!

Monday, September 30, 2013

Hair Tutorial-Boho Chic Ponytail

Hi Ladies,
This is a cute ponytail tutorial I got off  of Pinterest:

How To Do a Boho Chic Ponytail


Steps :
  • 1 : Curl the top layer of hair with the rest of your hair messy/curly. Mine was kind of curling from no heat curls the night before.
  • 2 : Tease your hair starting just past your bangs on top, back to where you will secure your ponytail
  • 3 : Gather your hair in place where you want it, not tight at all, and secure with an elastic.
  • 4 : Pull tight, then pull out strands as needed to create a “messy on purpose” type of look.
  • 5 : Wrap an extra piece of hair around the elastic.
  • 6 : And You’re done!

Source : Boho Chic Pony


Source: http://pintutorials.blogspot.com/2013/01/how-to-do-boho-chic-ponytail.html

Sunday, September 22, 2013

Hair Tutorial-Stranded Twist

Hey Girls,
Is there ever a time that you wake up for work and just don't feel like doing your hair? This happens to me all the time. Below is a quick and easy twist you can do to the front of your hair to add a little something to natural waves or a pony on a low maintenance hair day. I also do this frequently when my layers in my bangs are growing out. 


Enjoy!

Tuesday, September 17, 2013

Cute and Easy Hair Tutorial-Top Knot Bun

Here is a quick and easy hair tutorial of the Top Knot Bun. It takes about 5-10 minutes and is a cute hair do when you don't feel like wearing your hair down. I found this on YouTube searching for new hair styles. The woman in the tutorial has a ton of cute hair and makeup videos on her YouTube page makeupbybella.


Enjoy!


Monday, September 16, 2013

Products Worth Your While- Hot Buns

Hey Ladies,
Here is my review of hot buns:


 I saw the infomercial on tv a while back and decided to buy it and try it out. The directions in and on the box are pretty self explanatory. The kit comes with two size buns. Small and large. The small is a little too small for me personally but would work well with shorter or thin hair. The Hot Bun is a little tricky at first but once you get the hang of it its pretty simple.

Like any hair style, practice makes perfect. My buns take anywhere from 5-15 minutes depending on how anal I am that day. If you are good at not having bumps when putting your hair in a ponytail you should be good. That seems to be the hardest thing for me. A trick I have found helpful is to either wet your hair with a spray bottle (not your ponytail, only where you are pulling the hair back). Also, you can use a bristle brush and push all the bumps towards the elastic where your hair will be hidden. When I straighten my hair and don't wash it the next day, I tend to have an easier time with not having bumps around my ponytail.


Related Posts Plugin for WordPress, Blogger...